How to Weld on Rust and Rusty Material
americanindustrialsupl and its partners may earn a commission if you purchase a product through one of our links.
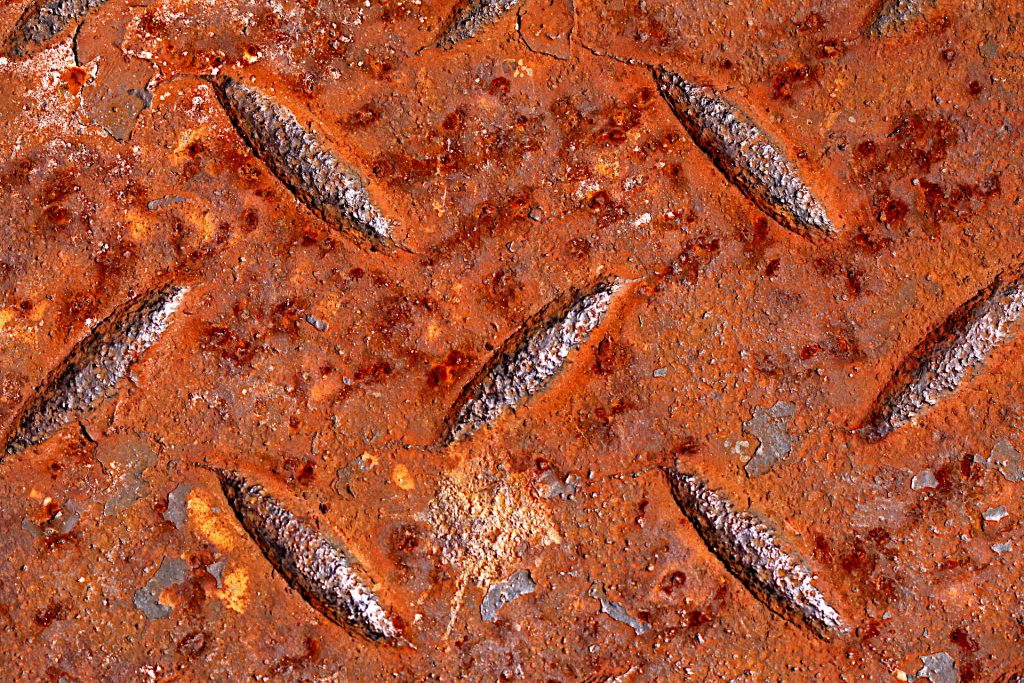
Dealing with rusty materials is one of the most common problems you’ll face as a welder. You are unlikely always to be lucky enough to have a workpiece that’s free of rust and dirt. Rust formation on steel or iron is an inevitable phenomenon from water contact and moisture in the atmosphere. Its presence can significantly impact welding processes.
- With Rusty Metal Preparation is Crucial: Before welding, thoroughly clean the surface with a wire brush or grinder and use a rust converter if necessary, to ensure a robust weld.
- Choose the Right Welding Method: Stick, MIG, and TIG welding are viable options, each with unique advantages; selection depends on the specific requirements of the project.
- Check Weld Quality Rigorously: After welding on rusty metal, inspect for proper penetration and signs of porosity or slag inclusions, as these can compromise the weld’s structural integrity.
- Post-Welding Care is Essential: To prolong the life of the weld, grind or sand the area, apply a rust inhibitor, and consider a finish coat for further protection and aesthetics.
The nature of your material and its intended application play a pivotal role in determining the success. Dealing with rusty materials is therefore, one of the most common problems you’ll face as a welder.
The way you plan to use your welds, as well as the nature of the material affect how robust the joint is. are. The nature of the materials and the end use also determine the welding method that you employ. Below we will discuss how rust affects the metal in relation to the welding process, most effective cleaning methods and how different welding can affect the weld.
Problems Posed when Welding on Rusty Steel
Welding on rusty metal isn’t necessarily difficult, but you do need to do a little more work to ensure you produce strong welds. Welding on rusty material can pose several challenges.
- Steel items you are welding can have varying degrees of corrosion. If rust is already present on your workpiece, creating an accurate weld can be more difficult.
- Elements such as rust, pitting, and corrosion can significantly decrease a metal’s ability to conduct heat, affecting your welding work.
How Rust Forms in Stages
Rust forms in three stages, and it starts with reddish-brown spots. These are superficial rust that covers a small portion of the surface. After this initial stage, the metal becomes more prone to decay and oxidation, which causes darker discoloration and further deterioration in appearance as well as increased corrosion resistance (i.e., strength).
The next stage is when large portions of your materials begin to scale or flake off due to this decay process called ferrous oxide formation on iron and steel surfaces exposed for long periods of time under wet conditions such as rain or sweat during welding operations.
The extent of scaling, whether a large portion of the metal undergoes scaling, depends largely on how much moisture was present when welding was performed; however, some factors include:
Preparing Rusty Metal for Welding
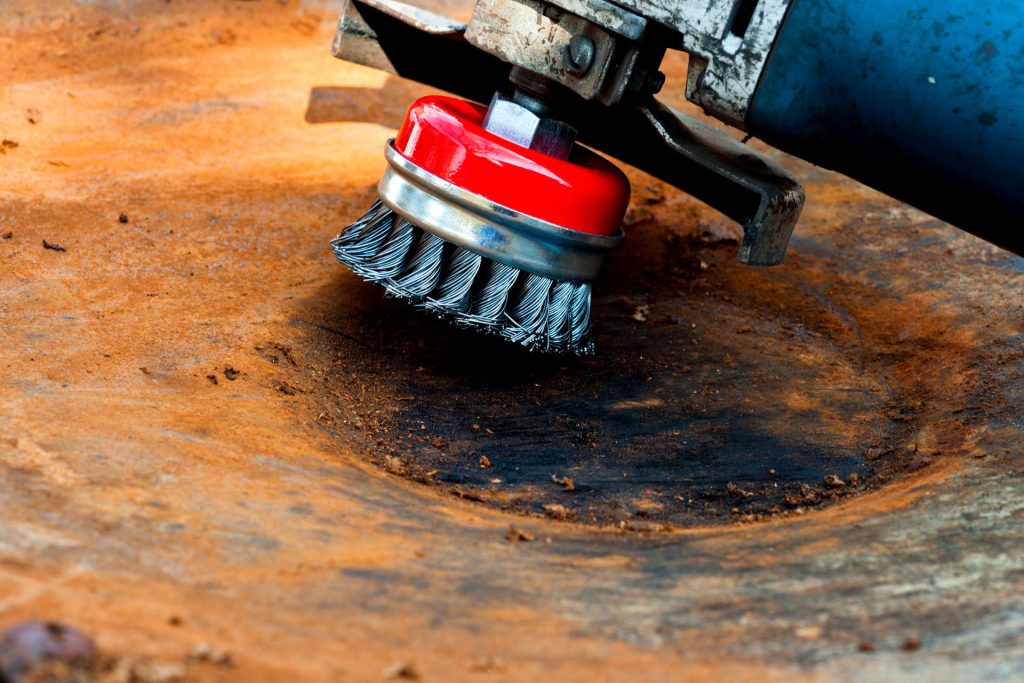
Before beginning the welding process on rusty metal, it is essential to properly prepare the workpiece to ensure a robust and reliable weld. Here are some steps to follow:
- Clean the surface of the metal: Use a wire brush or grinder to remove as much rust and debris as possible. This will help to create a smooth and clean surface for welding.
- Grind away any remaining rust: Use a grinder or sandpaper to smooth out any rough or uneven areas on the metal. This will help create a more consistent welding surface and reduce the weld’s risk of cracking or failing.
- Use a rust converter: If the rust is severe, you may consider using a rust converter to help stabilize the metal and prevent further corrosion. Apply the rust converter to the surface of the metal and let it dry according to the manufacturer’s instructions.
Choosing the Right Welding Method for Rusty Metal
Several welding methods can be used on rusty metal, each with its own set of advantages and disadvantages. Here are a few options to consider:
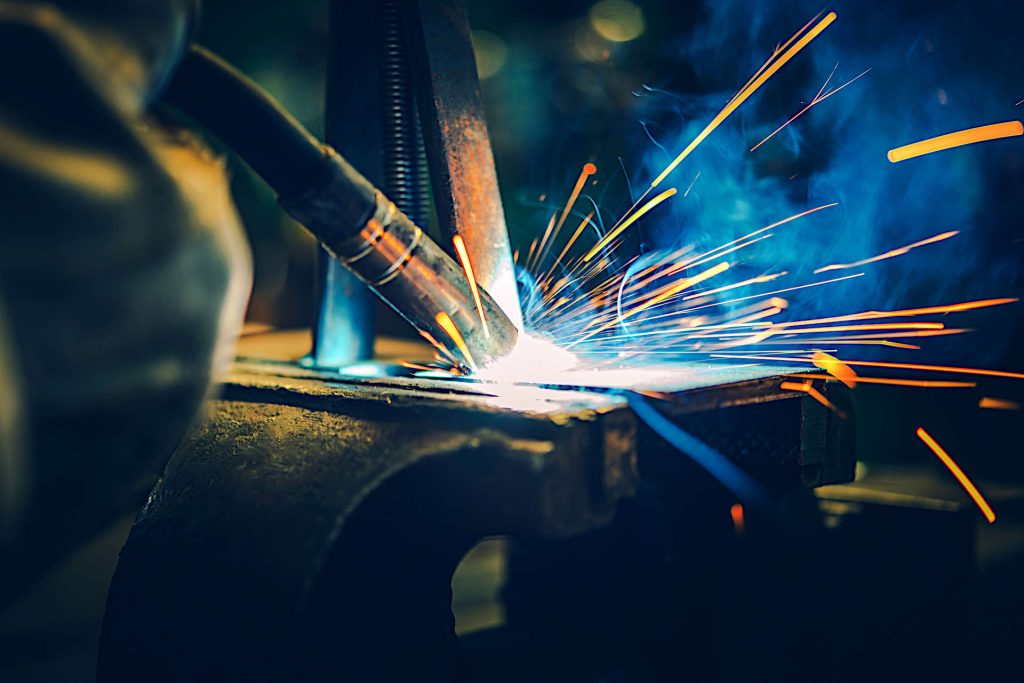
- Stick welding: Stick welding, also known as shielded metal arc welding (SMAW), is a common method for welding on rusty metal. It involves using a stick welding electrode, which is coated in a flux material that helps to protect the weld from contaminants and oxygen. Stick welding can be done with either a MIG or TIG machine and is relatively easy to learn, making it a good choice for those new to welding.
- MIG welding: MIG welding, also known as gas metal arc welding (GMAW), is another option for welding on rusty metal. It involves using a wire feeder to continuously feed a consumable wire electrode into the weld pool, which is protected by a shielding gas. MIG welding is generally faster and more efficient than stick welding, but it requires more specialized equipment and may be more expensive.
- TIG welding: TIG welding, also known as gas tungsten arc welding (GTAW), is a more advanced welding method that involves using a non-consumable tungsten electrode to create the weld. TIG welding is known for producing high-quality welds with a clean, visually appealing appearance, but it requires more skill and expertise to perform correctly.
Stick Welding on Rusty Metal
If you choose to use stick welding as your method for welding on rusty metal, there are a few things to keep in mind:
- Use the right welding rod: Choosing the right welding rod for your specific project and the type of metal you are working with is important. For welding on rusty metal, it is generally recommended to use 6010 or 6011 rods, as they are easier to use and produce good results in most situations.
- Use plenty of flux: Flux is a material that helps to protect the weld from contaminants and oxygen, and it is especially important when welding on rusty metal. Be sure to use plenty of flux to ensure a strong and reliable weld.
- Use a primer coat: Applying a primer coat to the metal before welding can help improve the weld’s adhesion and prevent it from cracking or failing.
MIG Welding Rusty Metal
MIG is a popular choice for welding rusty metal due to its versatility and efficiency. When dealing with corroded surfaces, certain considerations and techniques can enhance the effectiveness of MIG welding.
Key Considerations for MIG Welding on Rusty Metal
- Surface Preparation: Essential for any welding, but particularly crucial for MIG welding on oxidized surfaces. The area must be cleaned to minimize rust.
- Wire Selection: Utilize a wire that’s compatible with the base metal and suitable for welding over rust, like ER70S-6.
- Shielding Gas: A mix of Argon and CO2 often provides the best results, balancing penetration with cleanliness.
- Welding Technique: Adjust the technique to accommodate the imperfect surface caused by rust.
Advantages and Challenges
| Advantages of MIG Welding | Challenges in MIG Welding |
|---|---|
| Efficient for long welds and thicker materials | Requires thorough de-rusting of the surface |
| More control over the welding process | Sensitivity to contaminants like rust and dirt |
| Suitable for a variety of metals | Can be less effective on heavily corroded materials |
Steps for MIG Welding on Rusty Metal
- Clean the Metal: Remove as much rust as possible using a wire brush or grinding tool.
- Choose the Right Equipment: Select a MIG welder with appropriate power settings and a suitable wire.
- Set the Welder Correctly: Adjust the voltage and wire speed for the thickness of the metal and the extent of rust.
- Test Weld: Perform a test weld on a similar piece of rusty metal to fine-tune the settings.
- Weld in Short Stretches: To avoid overheating and further weakening the rusted metal.
- Inspect and Clean the Weld: After welding, check for any defects and clean the weld area.
Best Practices for MIG Welding Rusty Metal
- Pre-weld Preparation: Ensuring a clean, rust-minimized surface enhances weld quality.
- Continuous Wire Feed: Provides a consistent welding process, crucial for managing oxidation effects.
- Proper Ventilation: Essential due to the fumes and gases generated when welding over rust.
- Safety Gear: Always wear appropriate protective gear, including a welding helmet, gloves, and protective clothing.
While MIG welding can be an effective method for dealing with rusty metal repair, it requires careful preparation, the right equipment, and an adjusted approach to tackle the challenges presented by corrosion and oxidation.
TIG Welding Rusty Metal
TIG (Tungsten Inert Gas) welding, also known as GTAW (Gas Tungsten Arc Welding), stands out for its precision and control, especially when welding corroded metals. While TIG welding rusty metal poses unique challenges, understanding the right techniques and preparations can significantly improve outcomes.
Essential Considerations for TIG Welding on Rusty Metal
- Surface Preparation: Vital for TIG welding, as it requires a cleaner surface compared to other methods.
- Tungsten Electrode: Choosing the correct tungsten electrode, typically thoriated or ceriated, is crucial for effective welding on oxidized materials.
- Shielding Gas: Argon, or an Argon-Helium mix, is often preferred for its ability to provide clean, high-quality welds.
- Welding Technique: Precise control and slow travel speed are necessary to manage the inconsistencies of a rusted surface.
Advantages and Limitations
| Advantages of TIG Welding | Limitations in TIG Welding |
|---|---|
| High precision and control, ideal for detailed work | More challenging on heavily corroded materials |
| Produces clean, high-quality welds | Slower process compared to other welding methods |
| Versatile for various metals | Requires high skill level and thorough surface preparation |
Steps for TIG Welding on Rusty Metal
- Thoroughly Clean the Metal: Use a grinder or sandpaper to remove as much rust as possible.
- Select Appropriate Equipment: Choose a TIG welder and the correct tungsten electrode for the job.
- Adjust Welder Settings: Fine-tune the amperage based on metal thickness and rust level.
- Perform a Test Weld: Conduct a trial on a similar rusted surface to ensure settings are correct.
- Weld with Care: Employ a steady, controlled technique, focusing on consistency and penetration.
- Post-Weld Inspection: Examine the weld for quality and clean the area to remove any residual contaminants.
Best Practices for TIG Welding Rusty Metal
- Precision in Welding: TIG welding’s accuracy is ideal for tackling the inconsistencies in rusted metal surfaces.
- Controlled Heat Input: Essential to prevent warping or further damage to the weakened metal.
- Regular Cleaning of the Electrode: Maintains the quality of the weld on oxidized surfaces.
- Safety and Ventilation: As with all welding processes, use proper safety gear and ensure adequate ventilation.
TIG welding can be an effective method for rusty metal repair, especially when precision and weld quality are paramount. However, it demands a high skill level, meticulous preparation, and patience to address the intricacies of welding on corroded and oxidized metals.
Checking the Weld Quality when Welding on Rusty Metal
When welding on rusty metal, it is important to check the welds’ quality. The impurities from the rust can affect the weld quality and may cause porosity. Pinholes on the surface of your welds indicate that gas bubbles are trapped within the weld affecting their structural integrity. If you see slag inclusions (slag) in your welds, this will also affect their structural integrity and ability to withstand heat and pressure during operation.
- Check for proper penetration: When checking for proper penetration into an area where there is rust build-up, check both ends of your piece before cutting away any excess material around them. This way, you can ensure that a probe has properly penetrated both ends before removing any more material from around them, so they do not get damaged while being transported or installed after welding has been completed.
Additional Passes as Necessary
- If you are having trouble getting your welds to stick, you may need to add additional passes.
- To determine whether you need to make another pass, check for any signs that the weld is weakening. Look for changes in the color or texture of the material being welded. Also, inspect between each pass: if there is no change in color and texture after cleaning, then it is likely that another pass will not help, and a new one should be started from scratch.
Safety Precautions for Welding on Rusty Metal
Welding on rusty metal can be dangerous, as it involves working with high temperatures and potentially hazardous materials. To ensure your safety and the safety of those around you, be sure to follow these precautions:
- Wear proper protective gear: Always wear a welding helmet, gloves, and protective clothing when welding. This will help to protect you from the intense heat
and bright light generated by the welding process, as well as from any sparks or flying debris.
- Work in a well-ventilated area: Welding can produce harmful fumes and gases, so it is important to work in a well-ventilated area to prevent inhaling these toxins. If possible, use a ventilation system or open windows to help dissipate the fumes.
- Follow proper grounding procedures: Welding involves the transfer of electrical current, so it is important to follow proper grounding procedures to prevent electrical shocks and other accidents. Be sure to use a grounded power source and properly connect the ground clamp to the workpiece.
- Keep flammable materials away: Welding can produce sparks and hot debris, so it is important to keep flammable materials away from the work area. This includes things like paper, cardboard, and other combustibles.
Finishing and Protecting the Welded Area
Once you have completed the welding process on rusty metal, it is important to properly finish and protect the welded area to ensure it lasts as long as possible. Here are a few steps to follow:
- Grind or sand the weld: Use a grinder or sandpaper to smooth out the surface of the weld and remove any excess material. This will help to create a cleaner, more aesthetically pleasing appearance.
- Apply a rust inhibitor: To prevent further corrosion and extend the life of the weld, consider applying a rust inhibitor to the welded area. This can be a paint, coating, or other product that helps to protect the metal from rust and moisture.
- Apply a finish coat: If the welded area is visible or exposed to the elements, you may consider applying a finish coat to protect it. This could be a paint or other coating that helps seal further and protect the metal.
Considerations for Welding on Rusty Metal
There are a few things to keep in mind when welding on rusty metal, including:
- Welding may not always be the best solution: Depending on the severity of the rust and the intended use of the welded object, welding may not always be the most practical or effective solution. In some cases, replacing the rusty metal with new material may be necessary rather than trying to repair it.
- Welding may not be aesthetically pleasing: Welding on rusty metal can produce a less aesthetically pleasing result than welding on clean, rust-free metal. This is especially true if the rust is severe or the weld is not properly finished and protected.
- Welding may not be as strong: Welding on rusty metal may not produce a weld as strong as on clean, rust-free metal. This is due to the inherent weakness of rust and the fact that it can interfere with the conductivity of the metal. As such, it is important to carefully consider the welded object’s intended use and load-bearing capacity when deciding whether to weld on rusty metal.

I’ve been involved in the welding industry for over twenty years. I trained in various engineering shops working on various projects from small fabrication and repairs through to industrial projects.I specialize in welding aluminum and food grade stainless steel and an now run an engineering shop fabricating equipment for the food industry.